Page Controllers
Every page of your app has a controller, which encompasses all of the JavaScript logic that controls that page. It is a common AngularJS concept, which you can read more about on Angular's official docs.
In Creator, controllers work just like you'd expect them to work in a standard Angular / Ionic app.
This section will cover very basic concepts about AngularJS controllers. It is recommended to use additional resources to fully understand how AngularJS, Ionic, and Controllers work.
How to Edit The Controller For A Page
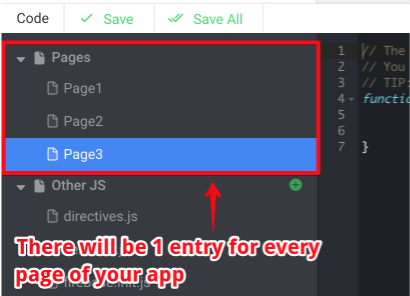
You'll see all of your controllers listed in the left pane of the code editor. First open the code editor by clicking the bar that spans the bottom of Creator while you're editing an app.

$scope
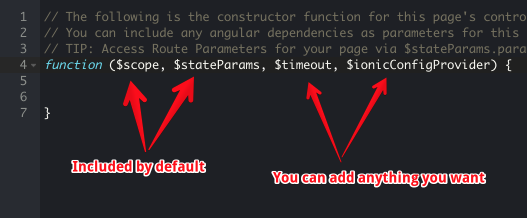
By default, you will see that we've injected $scope (and $stateParams) into the controller. That is because this is the most common object you will rely on while you're programming your controllers.
Any dynamic data that you want to be available for use visually in your app needs to be stored on $scope. You can then use these variables throughout page and component properties, or in HTML-based pages.
To learn more about using $scope variables in your pages, read the Templating Syntax section.
Other Dependency Injection
You will also notice that we've included $stateParams by default in your pre-generated controller template. This is how your controller gets access to any route parameters you've defined for the given page.
To learn more about how to use $stateParams, read our section on Route Parameters.

Just like a normal AngularJS controller, this is where you'd inject other dependencies. Some common examples would be:
- $rootScope
- $timeout
- $http
- $ionicConfigProvider
- etc.
A Real Example
To see an example of programming a page controller, see our tutorial on how to make forms work with data.
Updated less than a minute ago
