Buttons in Headers
Header Buttons allow you to make your header more functional by adding both Icon and Text based buttons to it. Watch this quick video showing you how to use them, or read along below.
Adding Buttons to your Header
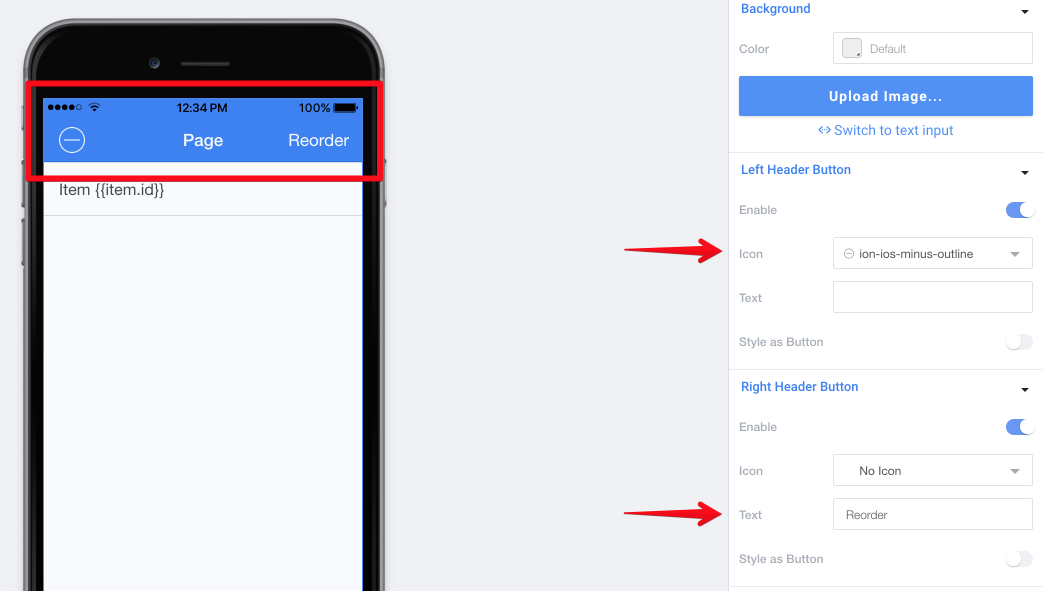
In the properties panel of your page you'll find the settings for your Header Buttons. You can add one button to the left side of your page and one to the right.
Each button can have an Icon set, text set, or both.

After Enabling the button, just select your icon or text and your button will be added!
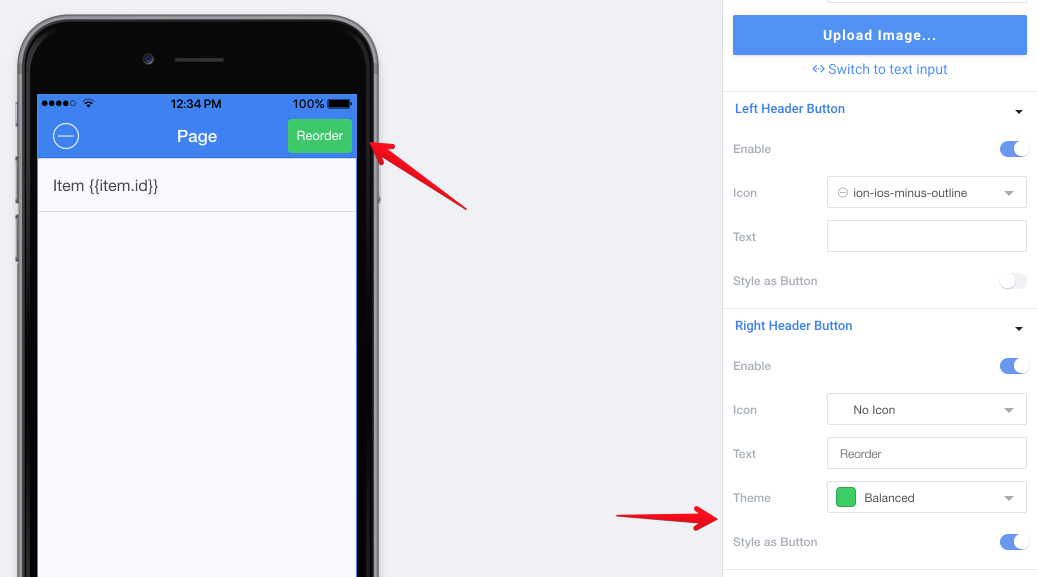
By default, header icons are set to "icon/clear" (Ionic style terms) which means that they will be large and not actually look like a "real button." Alternatively, you can toggle on "Style as Button" which will let you turn the icon/text into more of a button style, as well as set a theme for the button color.

Making your Header Buttons do stuff
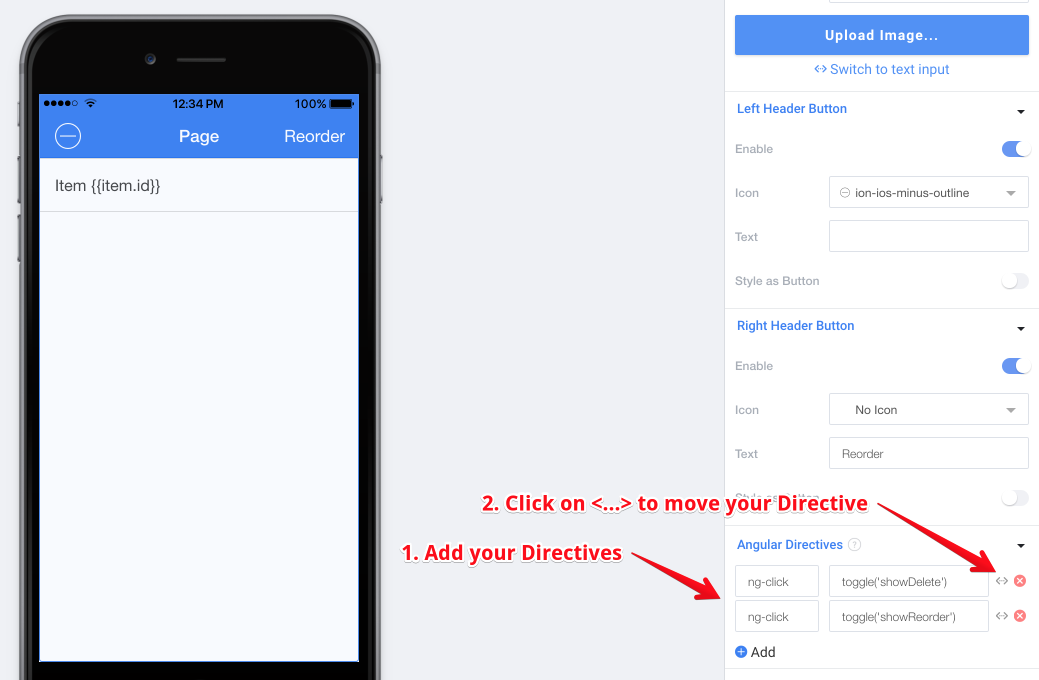
In order to add actual functionality to your header buttons, you'll have to use the Angular Directives property. Here you can add an ng-click or any other directive to your button.
You MUST move the Directive to the Header Button
Read the instructions below.
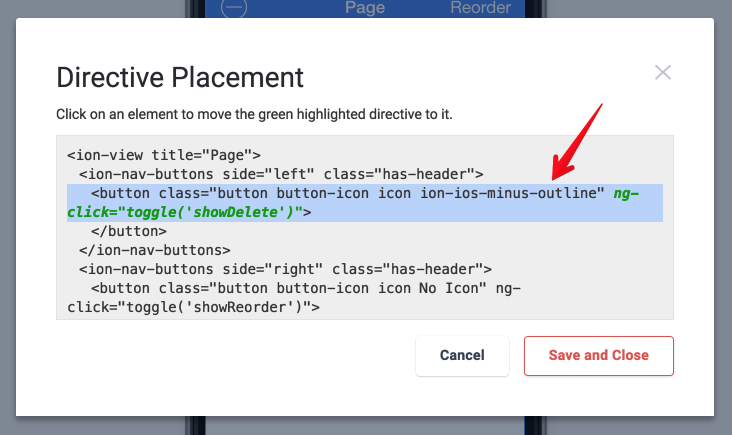
In order to actually add the Directive to your button, you must move it to the right place in the HTML output. (Read more about Directives.)

After adding the directive, click on the <...> button and move the directive to the correct piece of the HTML. You're looking for the <button>s in <ion-nav-buttons side="left"> or <ion-nav-buttons side="right">.

Updated less than a minute ago
